
The Latvian braid cast on is often used on mittens with Latvian and Scandinavian patterns.
But this beautiful cast on works wonders for any project that needs a pretty edge!
A cute cast on like the Latvian braid cast on adds a little extra detail and can make a project look a little more put together.
It looks advanced, but it’s actually not that hard to learn.
Let’s start at the beginning, what’s a Latvian braid?
In this post, we’re talking about the Latvian braid cast on, which creates a braid along the cast on edge. It’s commonly used for mittens but looks cute on most projects. It can be made in one or several colors, my favorite is the two-colored one!
But, there’s also a technique to add a decorative element called Latvian braid that adds a lateral braid that appears on top of the knitted fabric. This type of braid can also be knitted in one or several colors.
A Latvian braid can be added in the middle of a project and is commonly used together with the Latvian braid cast on as they look the same.
I’m working on a post and a video about the Latvian braid too, they will be published on the site and Youtube next week!
Like knitting video tutorials?
––> Subscribe to my Youtube channel so you don’t miss the new videos!
The characteristics of the Latvian braid cast on
The Latvian braid cast on is stretchy, and it bounces back to it’s original form easily.
It’s easy to do, it’s basically a long tail cast on but with two (or more) strands.
Latvian braid can be used when casting on for a flat project as well for knitting in the round.
Tutorial: Latvian braid cast on
The Latvian braid cast on is very similar to the long tail cast on so if you’re familiar with the long tail cast on this will be easy to learn!
The long tail cast on the tail of the yarn is used together with the working yarn to create the first rows of stitches on the needle. The Long tail method also creates a row that looks like purl bumps under the needle.
In Latvian braid cast on those little bumps are visible on the back and the braid is visible on the front.
We’re going to use two strands of yarn, I’m using two colors because it’s easier for you to see what I’m doing. (And I also like the effect!) The two yarn strands are twisted between every new stitch added, and that’s what makes the braid!
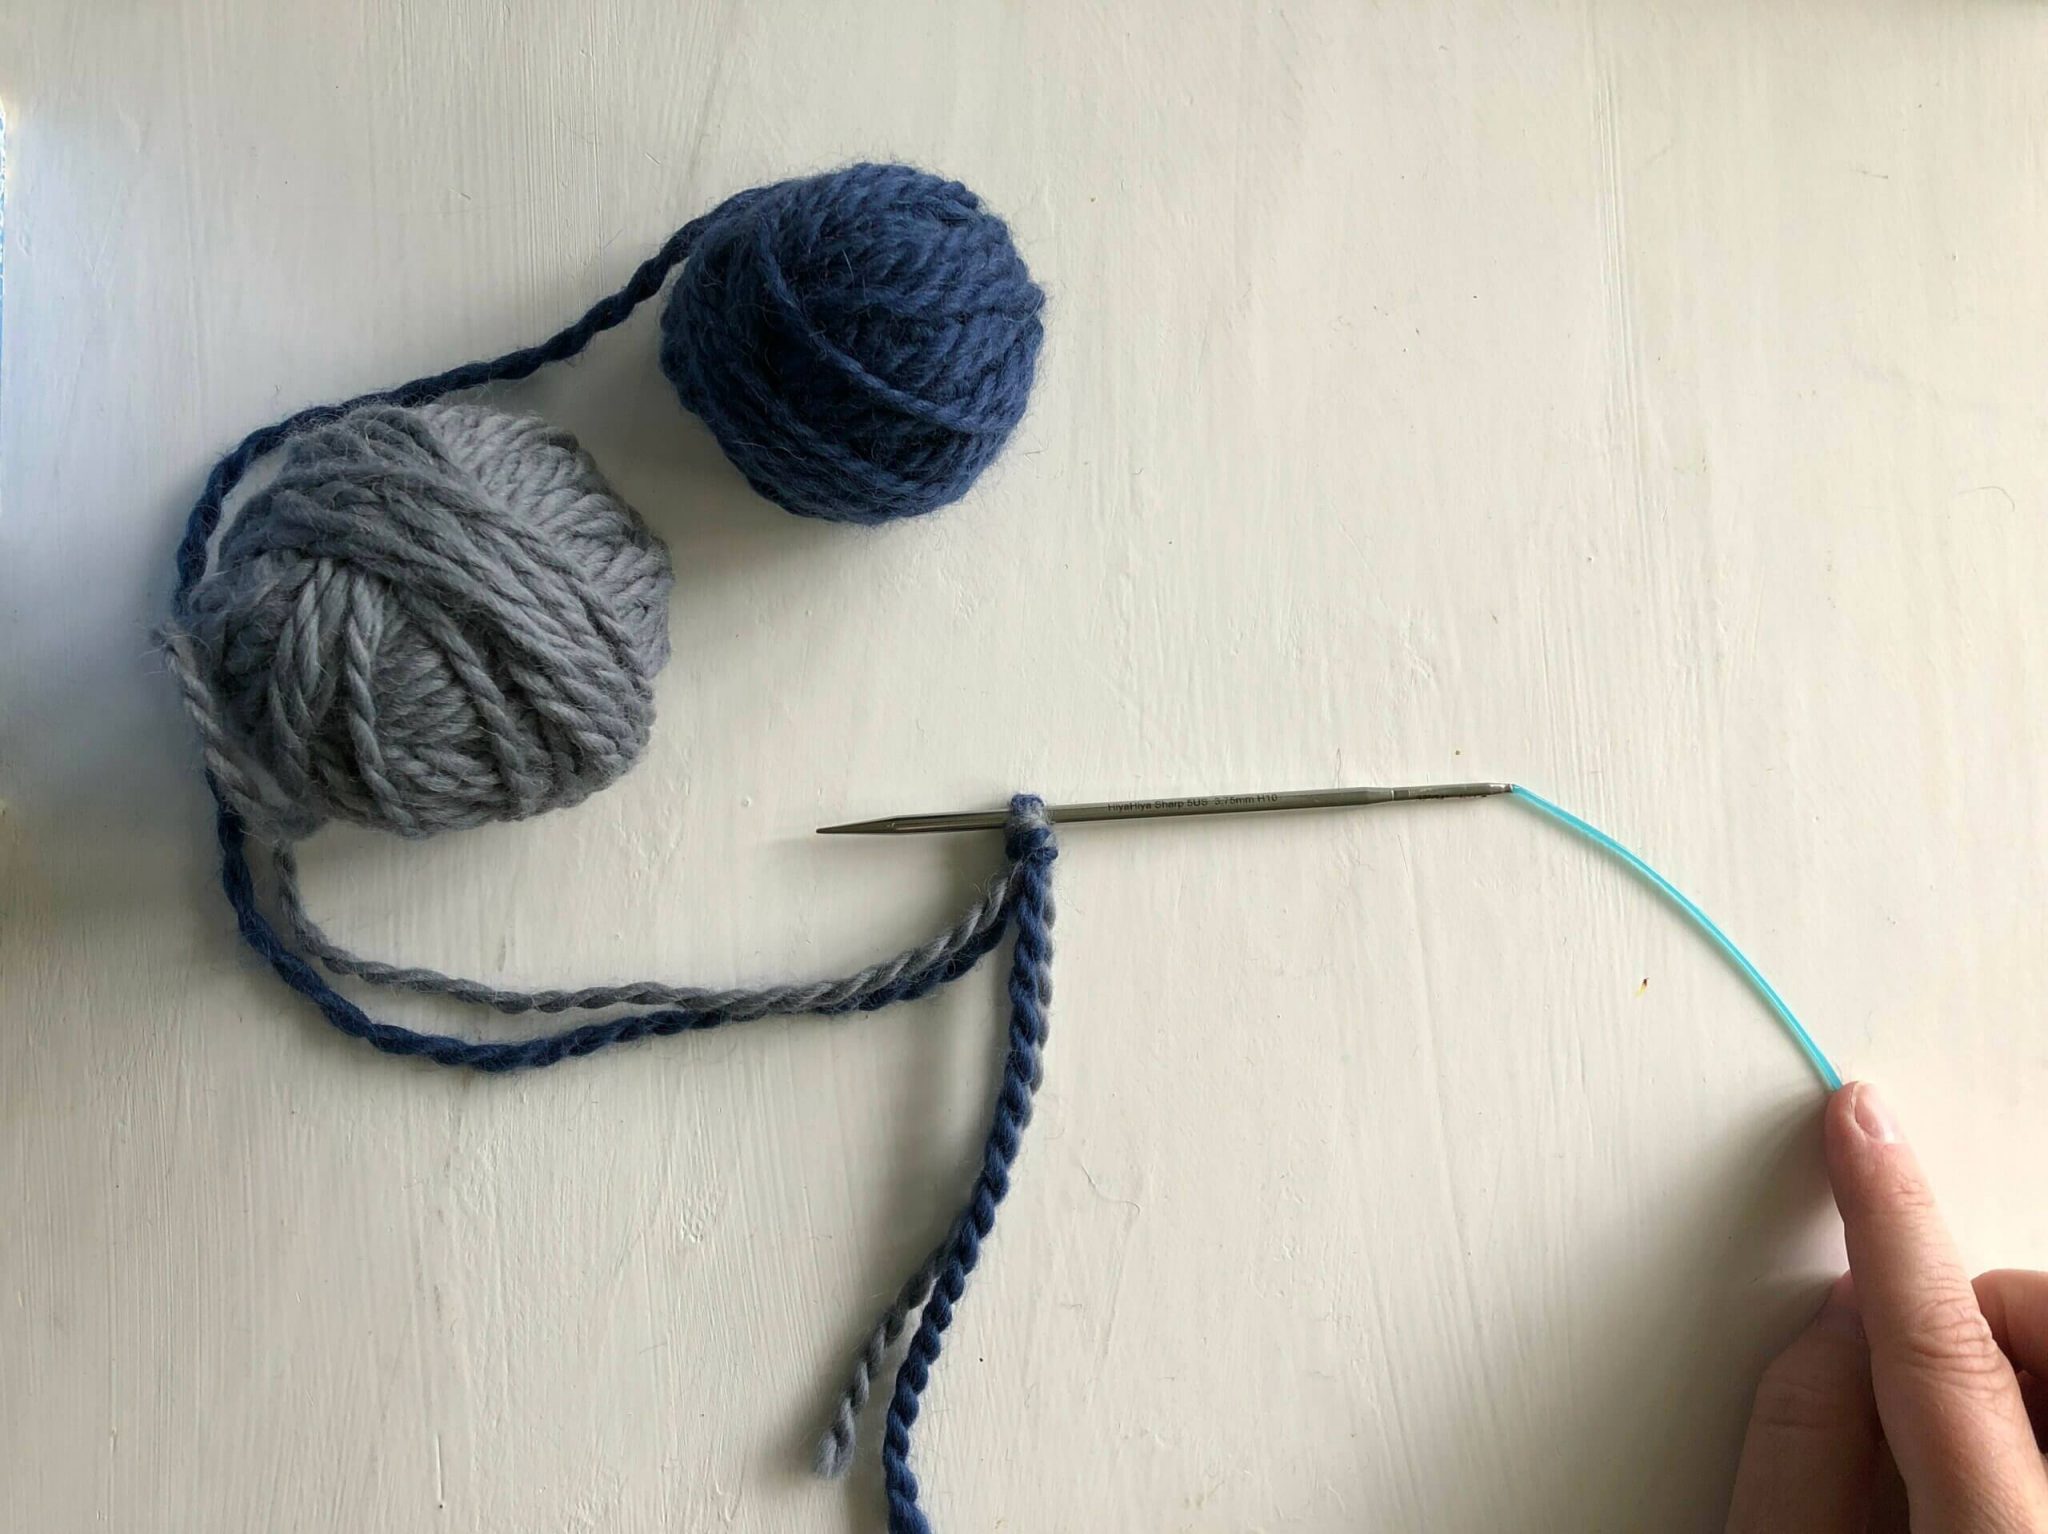
You will need two strands of yarn and a knitting needle that suits the yarn. It doesn’t matter if you choose to use straight, double-pointed, or circular needles.
Preparation step
Hold your two yarn strands together and make a slip knot with both. Put the slip knot on your knitting needle and pull it tight.
The slip knot is only there to attach the yarn to the needle and you can remove it afterward.
Reading tip: How to tie a slip knot for knitting or crochet
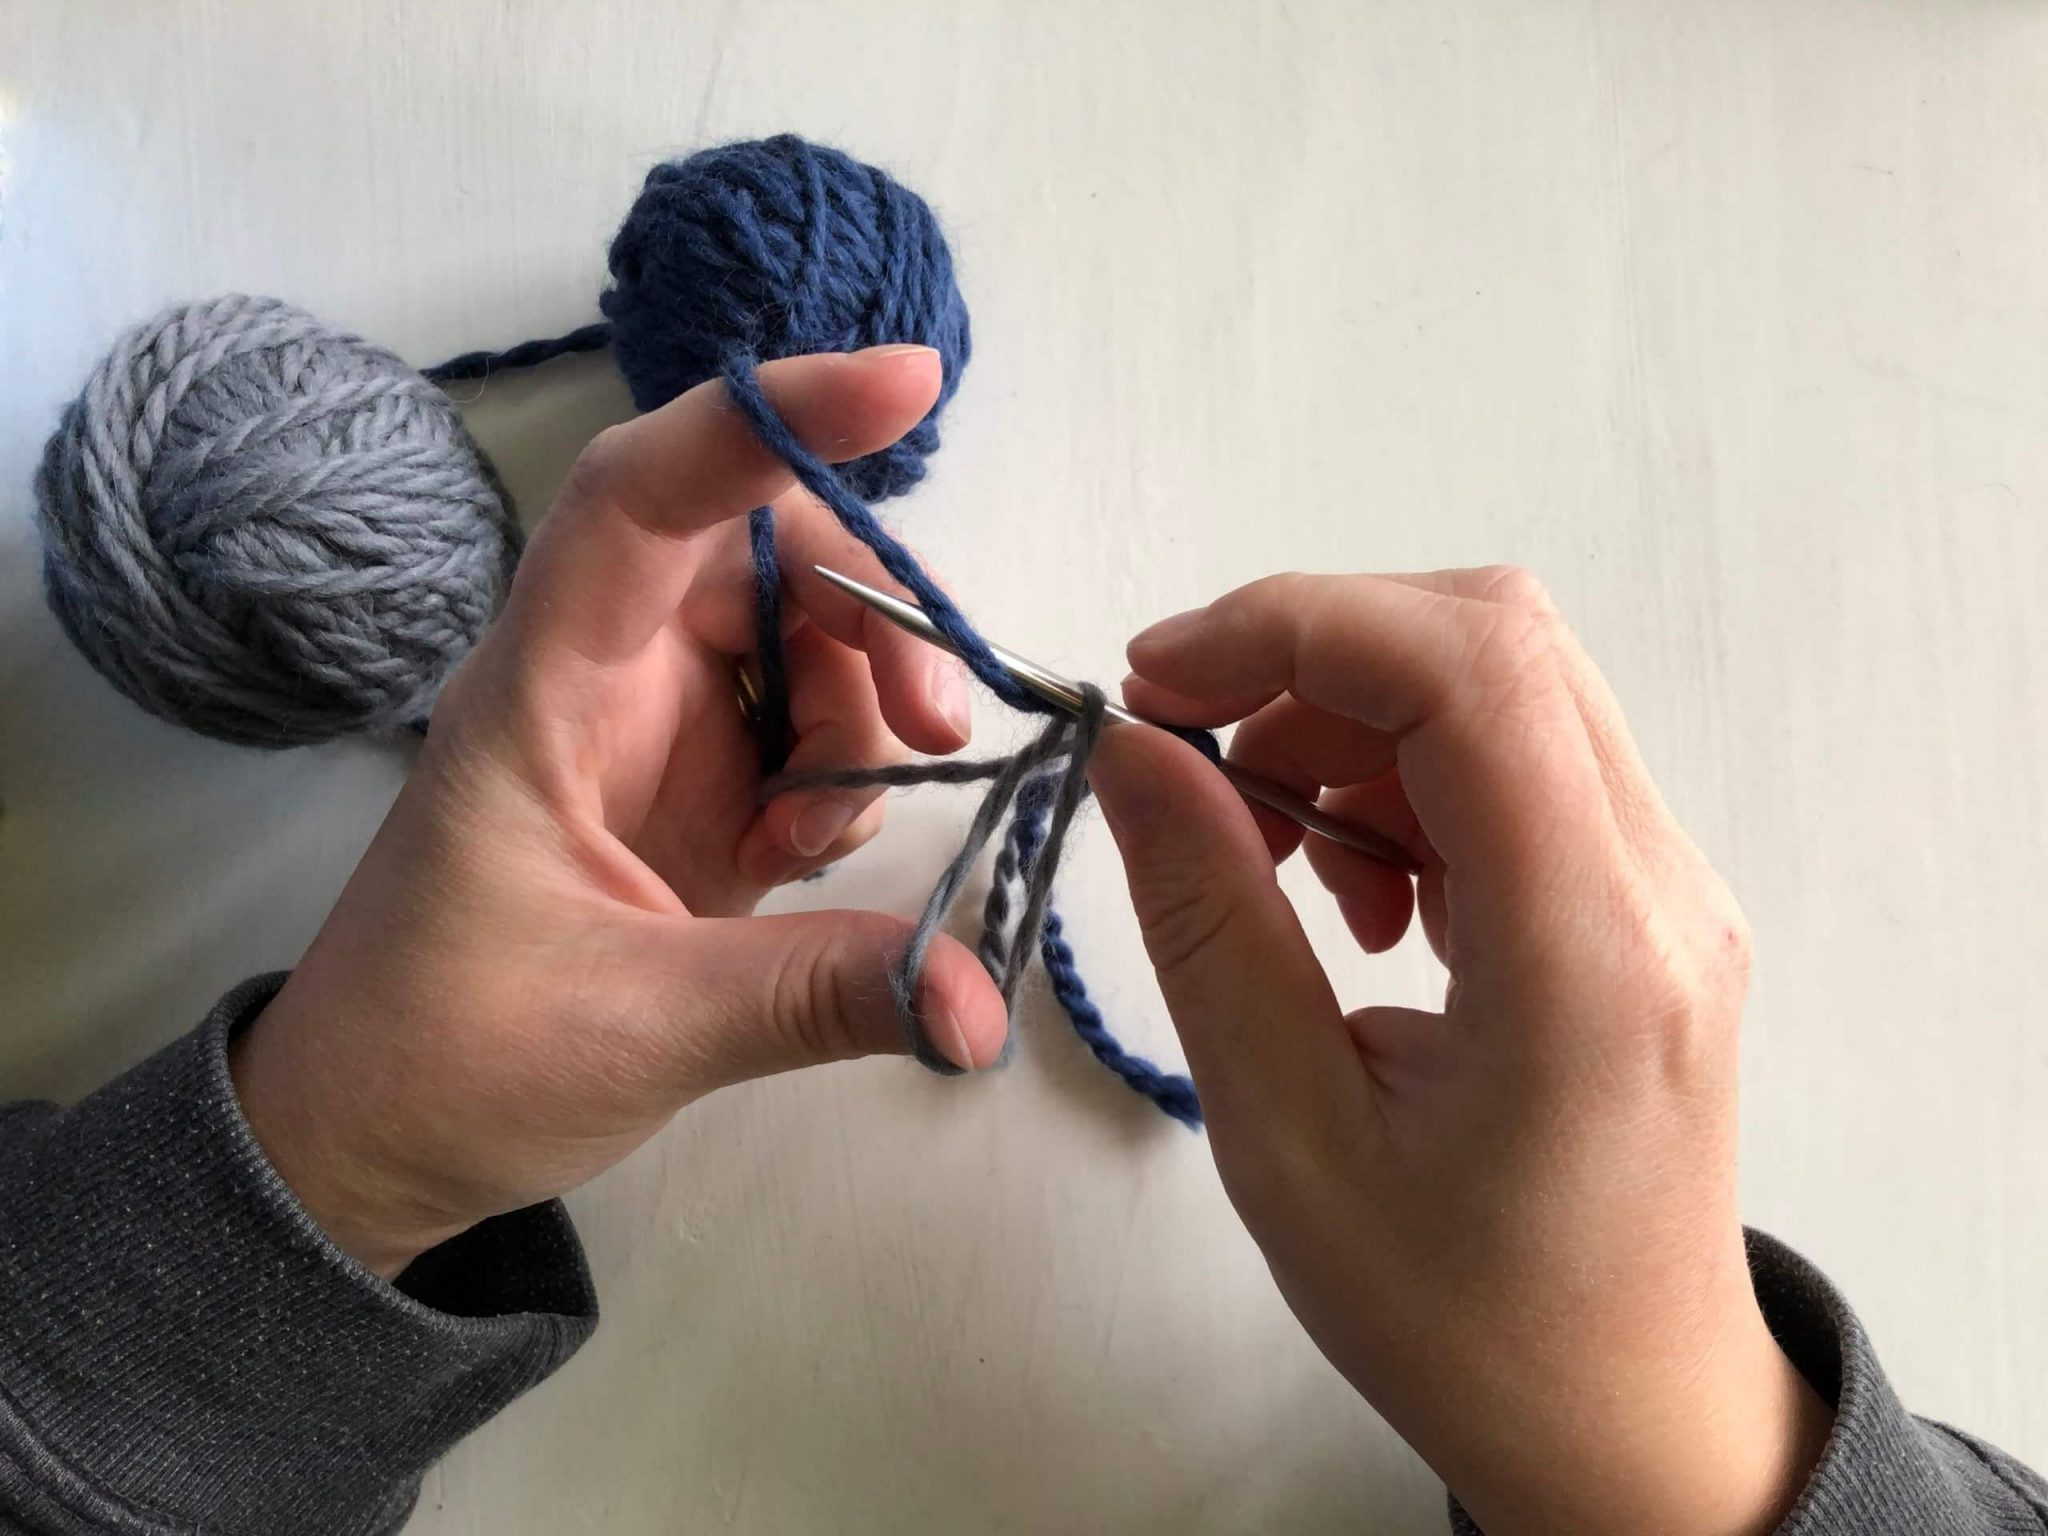
Step 1
Hold your yarn like you’re about to do the long tail cast on.
Color A around the thumb and color B around the index finger. gather the strands in your hand and hold them in place with your pinky finger.
The needle is in your other hand.

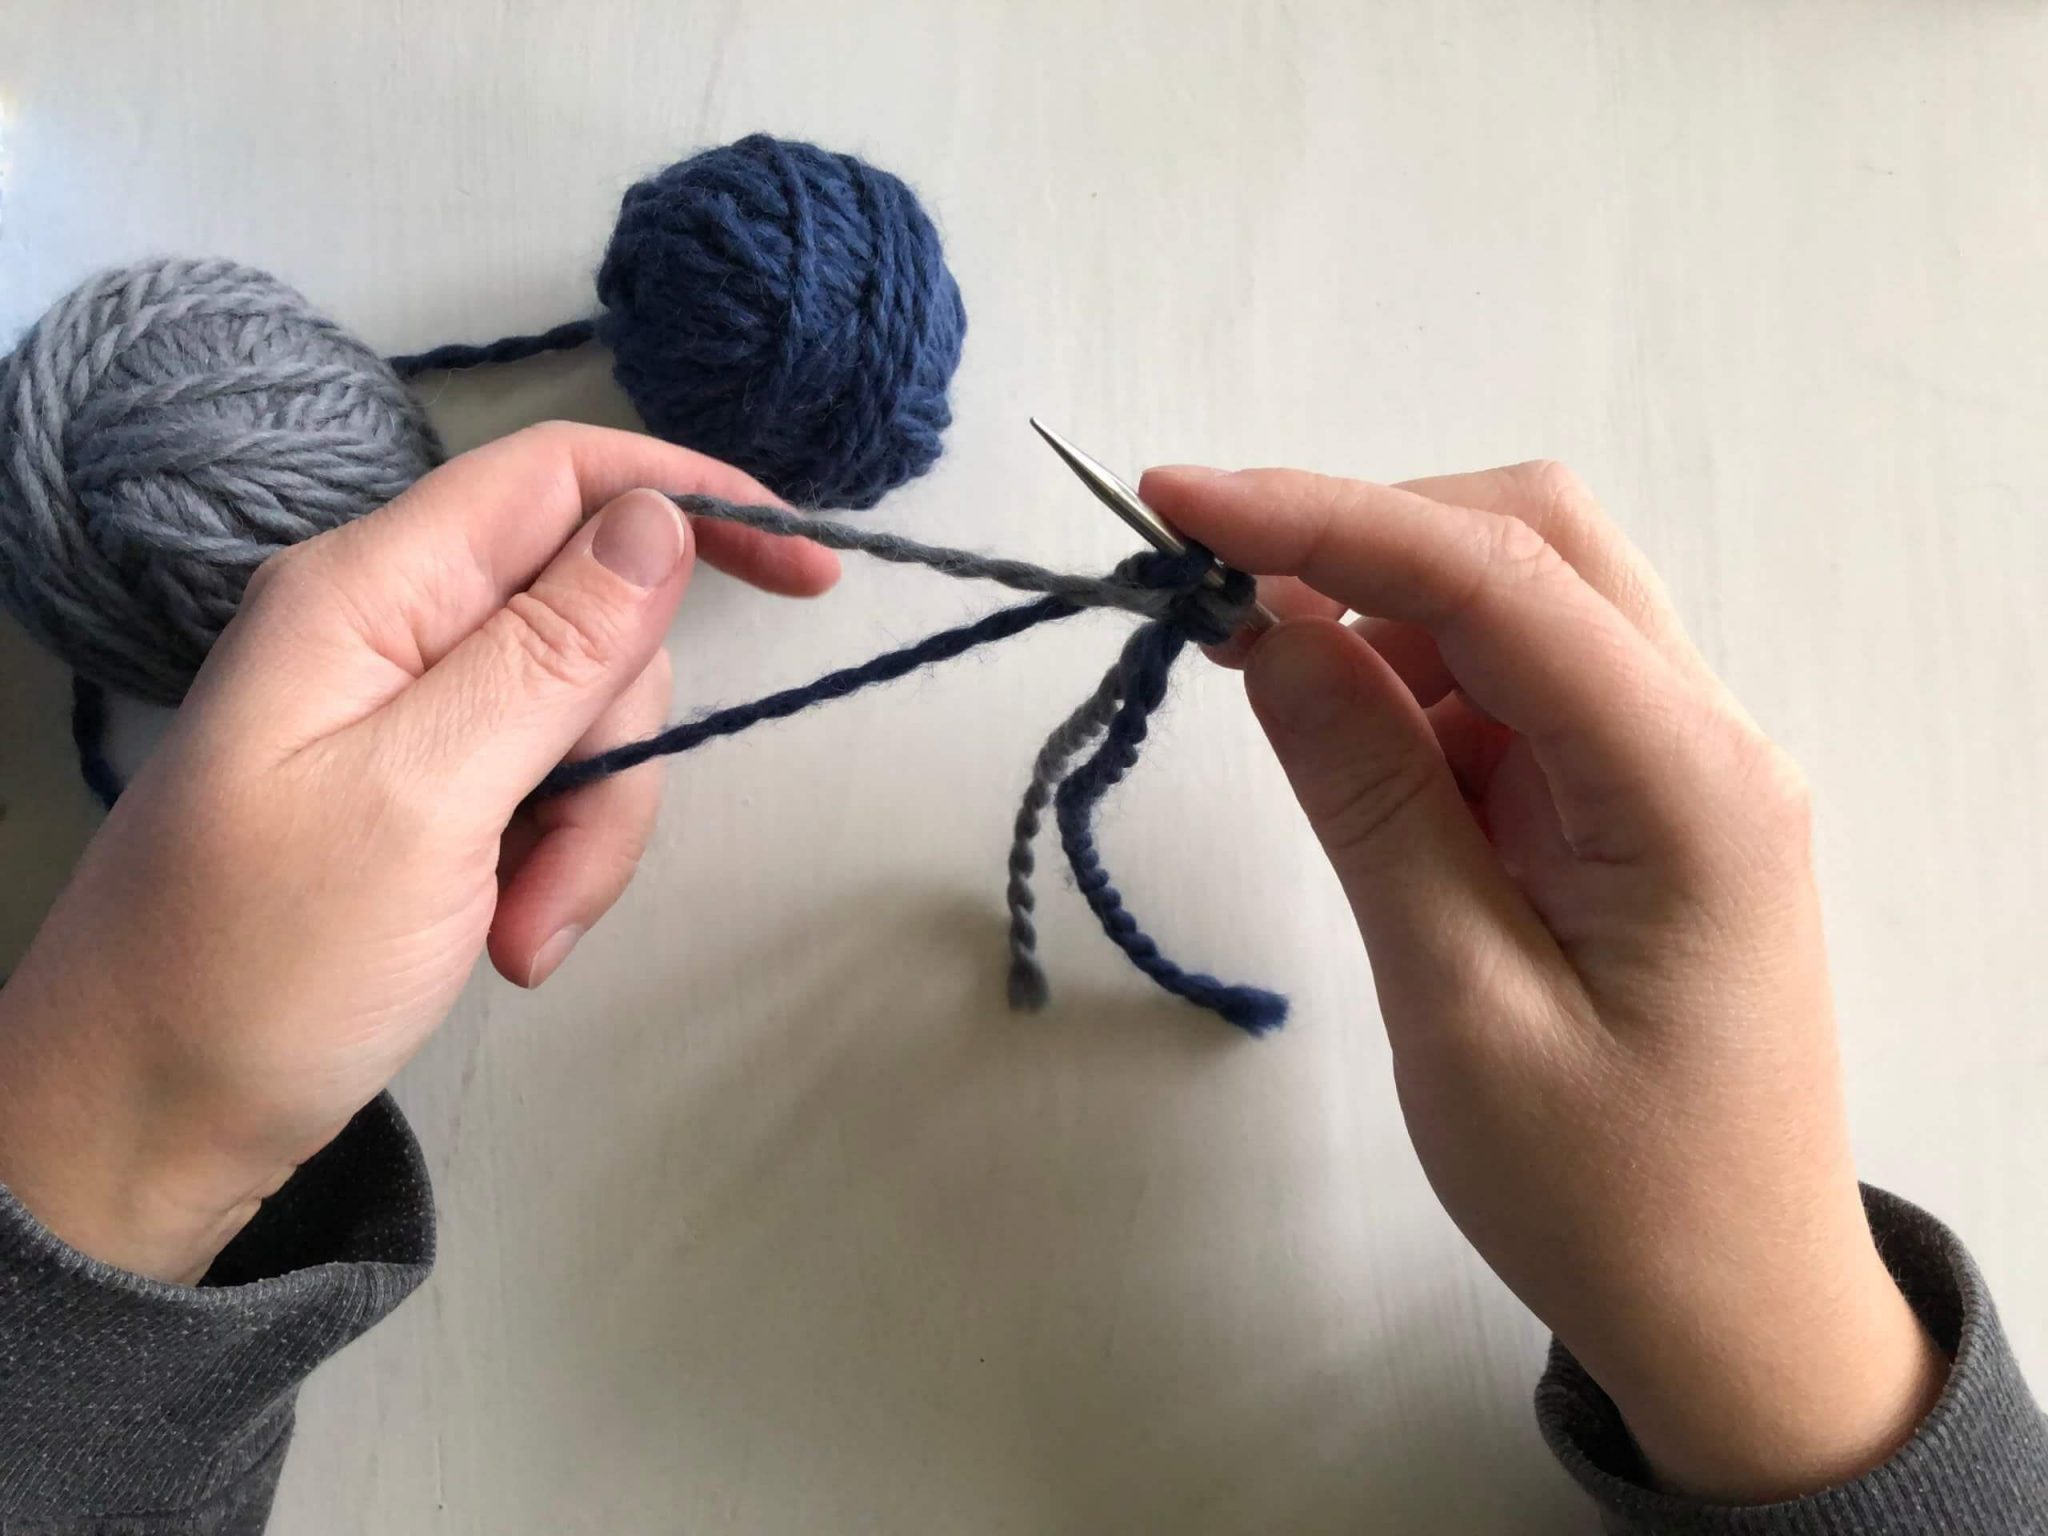
Step 2
Move your needle in under the yarn strand in front of your thumb (color A) and then upwards to bring the yarn with you.

Step 3
Bring the needle in behind the yarn strand in front of your index finger, and then against you so that a loop in color B is created.
Let the yarn slip off your thumb and pull both strands gently to form a stitch on the needle.
This is your first stitch in color B

Step 4
The twisting of the yarn strands is what gives the braided effect.
Be sure to always bring the strand from your thumb over the other strand. If you twist them the other way the braid will be messed up!
When you have twisted the yarn strands it’s time to start over from step 1 again. Continue like this until you have enough stitches on your needle.
Casting on for knitting flat or in the round
This method for casting on also creates the first row of your knitting. That first row is a right side row.
If you get confused just remember that the side with the braid is the right side and the side with the little bumps is the wrong side.
This means that if you’re knitting flat, the first row knitted after the cast on will be a wrong side row, a purl row if you’re knitting stockinette.
When you have knitted the first row, remove the slip knot you started with.
And if you’re knitting in the round, the first round will be a knit round if knitting stockinette. Remember to remove the slip knot before you start knitting in the round!
Video tutorial: The Latvian braid cast on for knitting flat
The video below shows how to use this cast on method for knitting flat. I you wish to learn how use this cast on for knitting in the round, just scroll down there’s a video for that too!
Don’t be scared by me using circular needles, you can use whatever needles you like. Personally I always use my interchangeable knitting needles from Hiyahiya.
If you’re curios about my needles you can read more in this post: Seven years of use – Review of Hiyahiya knitting needle set
My goal with this site is to share techniques, tips, and products for knitters and crocheters to spread my love for yarn crafts. One way I do that is by recording short video tutorials. It’s fun to do, and we learn in different ways!
Do you like to see more video tutorials like this?
Subscribe to my Youtube channel!
Video tutorial: The Latvian braid cast on for knitting in the round
In this video I show how to use this cast on technique for knitting in the round on circular needles.
Latvian braid cast on is more commonly used for knitting in the round on circulars or double pointe needles as it’s often used for Scandinavian-style mittens!
Your next read:
––> Yarn weights explained + a free cheat sheet!
––> How to knit double stockinette stitch
––> Labels for knit and crochet projects