
Bunny Garland – An easy Spring & Easter DIY!
As an Amazon Associate and member of other affiliate programs, I earn commissions from qualifying purchases at no additional cost to you.
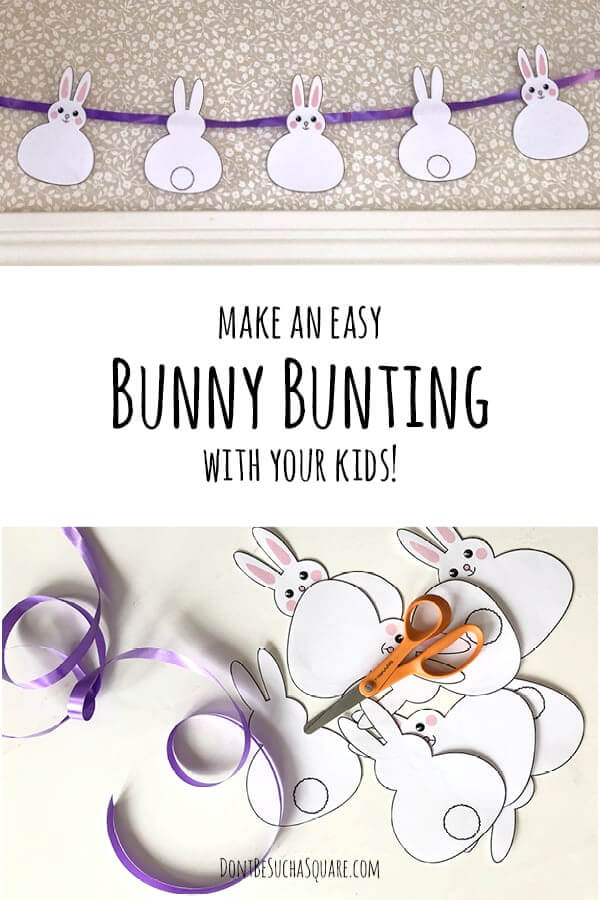
Hi, there fellow crafters! Thought I should surprise you with a papercraft instead of a knitting or crochet related post today – a Bunny Bunting!
Spring is coming and with Easter just a couple of weeks away I feel inspired to do some Easter papercrafts!
This decorative bunny bunting is perfect for spring and Easter and super simple to do. My kids loved making this and immediately started planning for more Easter garlands 🙂
Easy crafting!
As you may know, I like my crafts to be easy and this one really is! You don’t need any special craft supplies or skills.
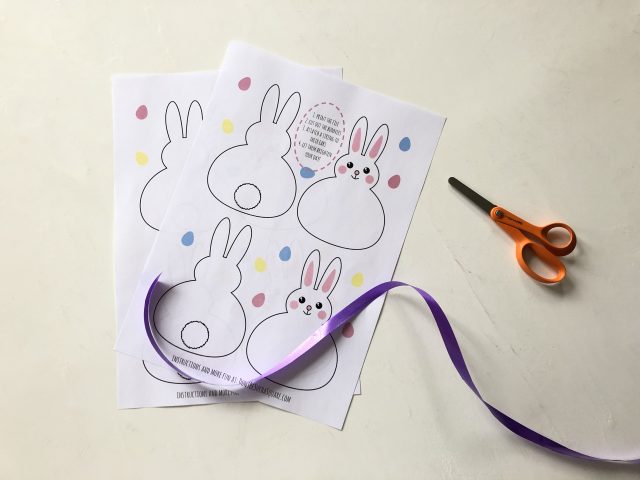
I started by drawing out this cute bunny design on my laptop so we can let the printers do the job for us!
Unfortunately, I don’t own a Cricut to cut my designs. On the other hand, I have kids old enough to cut neat and tidy yet young enough to enjoy doing it. Lucky me! 🙂
Feel free to print these bunny buntings as many times as you want. Make garlands for all your rooms, or use them for other spring or Easter crafts!
Bunnies for everyone!
You will find the download link for the Bunny Garland further down in this post. Don’t forget to pin the post so you can easily find it, you’ll never know when you feel the urge for some bunny crafts again!
How to assemble the Easter Bunny Garland
When the design of the bunny Garland was finished I printed the file on my home printer on regular printer paper. They came out a bit flimsy, but I don’t mind as they are going to sit against a wall.
Both I and the kiddos were too impatient to wait until we could buy some cardstock. But, if you have some self-control and like your garlands sturdy, I suggest you get some white card stock like this.
I will list all the supplies I used and suggested for this craft under “Materials used” below
To color or not to color?
There are two files to choose from. The first has a pink nose, cheeks, and ears.
The second one is black and white so you can color it as you wish. Maybe you want to give your bunnies different personalities? A cute bow, a pink belly, or flowers in their “hair” would look adorable!
Color: Open the print file for colored bunnies in a new tab by clicking here!
Black&White: Open the file for the black and white version here!
How many sheets do you need
There are four bunnies per sheet, two facing you and two showing their little tails. I wanted eight bunnies for my Garland so I printed the file two times.
I then spaced my bunnies out on a wrapping ribbon that I hade measured roughly to fit over one of our doorways, that’s about 90 cm/35,5 inches wide. I also added some extra string on both sides to hang it.
That gives you an idea of how many you may need. But of course, it also depends on how far apart you want to have your bunnies!
How to string the bunny garland
You can hang add the string in multiple ways. If you have a favorite, use it!
Use tape
I just put my bunnies with the blank side up on a table and taped wrapping ribbon to the back of their heads. It’s easy, fast, and works well especially if the bunting is placed against a wall.
Try a stapler
This type of garland can also use a stapler to attach the cutouts to the string. I have used this method a few times and it works great if you don’t mind the staples showing. For the white bunnies, I thought they may be a little too visible!
Or add holes and thread them up
A third option is to punch holes in the ears and thread your string through. For this method it’s better to use a round string like yarn or twine, the flat and wide wrapping ribbon will make your garland look wonky.
It can be a good idea to dip your threading end in some glue or add a bit of tape to it to make it easier.
Additional ideas for your Bunny Garland
Pompom tail
It would be super cute to add a little pompom over the bunnies tails, to look more like a real bunny!
To do this you need some scraps of yarn in a color of your choice. (Pastel pink would be perfect!)
I don’t have a tutorial on pompoms (yet) but that’s no problem because Sheep & Stitch does it so well!
Add backing
Worried that printing your bunny bunting on printer paper will be too flimsy? Want to have a nice reverse side? Then this tip is for you!
Print the file of your choice (colored or one to color in) and glue it on another paper.
You could go for a pretty patterned paper or maybe a light solid color? Either will look smashing!
Make them double!
If you want your garland to look pretty on both sides you could make each bunny double.
Print out twice as many as you need and glue one back and one front together making your bunny double-sided. Put the string between the pieces before attaching them to save some time and effort!
Add some cute stickers
If you want to make the bunnies even cuter try adding some nice stickers! Maybe a bow or some flowers for example? Or a pink heart on the tummy!
💛 🐇 💛 🐇 💛
Supplies for making the Bunny Garland
Well, I got a little enthusiastic as I love crafts and craft materials of all kinds. But this is a list of things you could have a good use for when making a bunting. Or crafting in general!
Printer paper I use this printer paper from HP, it’s just ordinary printer paper to a fair price. This link is to size A4, be sure to pick the right size for your printer!
Card stock. If you like your cutouts to be a little more sturdy you could use card stock instead! This links to size A4, be sure to pick the right size for your printer!

Printer. I use Photosmart 5510 from Hewlett Packard. It’s not the best (or newest!) on the market, but it’s good enough for my needs.
I love that it is wireless so I don’t need to plug it into my laptop. The fact that it has a scanner is also an awesome feature as I can scan my drawings and work with them on my mac.
Hole punch. I don’t have one of these, but I really, really want one. This would be useful for so many craft projects!

Wrapping ribbon. I used wrapping ribbon to make my bunny Garland, this set of pastel ones add the right look for spring and Easter.
Twine. You can also use twine, this is a nice rustic one that also goes well with the easter theme. Or, who am I kidding, twine goes well with every theme!
Tape. I have used a lot of tape over the years, but this is my favorite.
The best scissors ever for kids! My kids both have a pair of these scissors that we use for all kinds of crafting, but they’re mostly into papercrafts. These are so good! I borrow them whenever I need a good scissor, even though my hands are too big!

And some good scissors for adults. These are on my wish list, I have an older version of these that have been in use for over twenty years. They’re really good, but I long for the pretty colors and the soft grip…
💛 🐇 💛 🐇 💛
Like it? Pin it!
